


Candied fruits are one of the oldest methods of preserving fruit — and one of the most delicious. A well-made candied fruit strikes a delicate balance: the slight crunch of crystallized sugar, the tenderness of the flesh, and an intense concentration of fruit flavor. Yet the technique remains widely misunderstood, too often reduced to those tasteless red and green cubes found in mass-produced fruitcakes.
Making candied fruits at home means rediscovering the true nobility of this preparation. The process demands patience — several days, sometimes several weeks — but no technical skill beyond the reach of any motivated home cook. This guide walks you through the traditional syrup method, the best fruits to use, candying times, and all the ways candied fruits can be used in pastry-making.
The principle of candying: understanding the technique
How candying works
Candying rests on a simple principle: gradually replacing the water inside a fruit with sugar. This process works by osmosis — the concentrated sugar syrup draws moisture out of the fruit while sugar slowly penetrates the cells.
It cannot be done all at once. If you plunge a fresh fruit directly into a highly concentrated syrup, the osmotic shock will be too violent: the fruit will shrivel, harden on the outside, and remain watery at the core. This is why the traditional method proceeds in stages, incrementally raising the concentration of the syrup over several days.
By the end of the process, the fruit contains roughly 70 to 75% sugar. At that concentration, bacteria and molds can no longer develop — the fruit is preserved naturally, without any additives.
The difference between candying and crystallizing
Two terms often used interchangeably:
- Candying: the process of replacing water with sugar. A candied fruit is soft, translucent, and slightly sticky.
- Crystallizing (or glazing): an optional finishing step. The candied fruit is dipped in a very hot syrup, then left to dry — forming a crust of crystallized sugar on the surface. This is the classic finish of the candied fruits of Apt and Nice.
Candied fruits can be enjoyed without crystallizing — and for certain pastry applications (folding into batters, for instance), the uncoated version is actually preferable.
Homemade candied fruits recipe (makes 1 kg of fruit)
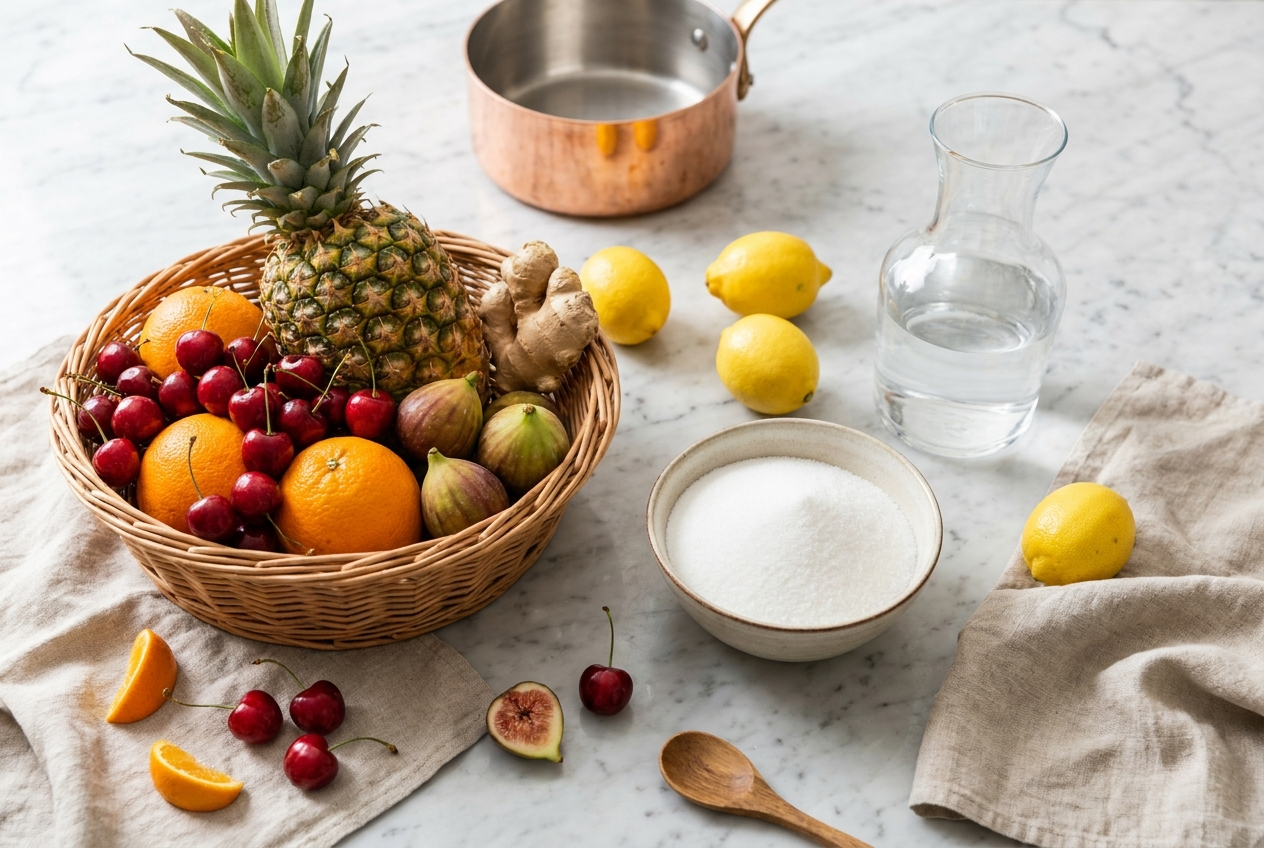
Ingredients



Equipment
- A wide, heavy-bottomed saucepan (copper is ideal but not essential)
- A cooking thermometer
- A refractometer or syrup hydrometer (recommended but not required)
- Wire racks and baking sheets for drying
Preparing the fruit
The choice and preparation of your fruit are critical:
- Wash the fruit thoroughly under cold running water.
- Peel as needed (for citrus: keep the zest, remove the flesh; for cherries: leave the stem on or remove it depending on the presentation you want).
- Cut larger fruits into even pieces. Small fruits (cherries, kumquats, apricots) can be candied whole.
- Blanch certain fruits to soften the skin and encourage syrup absorption. Citrus peels should be blanched 3 times in boiling water to eliminate bitterness.
The first syrup (Day 1)
Start with a light syrup:
Step 1
Dissolve the sugar
In the saucepan, dissolve 200 g of sugar in 800 ml of water.
Step 2
Bring to a boil
Bring the syrup to a boil.
Step 3
Add the fruit
Lower the prepared fruit into the boiling syrup.
Step 4
Simmer gently
Let simmer for 2 to 3 minutes — no longer, so the fruit doesn't cook through.
Step 5
Remove from heat
Take the saucepan off the heat.
Step 6
Rest for 24 hours
Leave the fruit in the syrup, cover the pan, and let rest at room temperature for 24 hours.
The initial syrup is intentionally light (around 25° Brix). It begins the osmotic process gently, without shocking the fruit.
Gradually increasing the syrup (Days 2 to 7)
This is the heart of the technique. Every day, for 6 to 8 days:
Step 1
Remove the fruit
Carefully lift the fruit out of the syrup with a slotted spoon.
Step 2
Add more sugar
Stir 150 to 200 g of sugar into the syrup.
Step 3
Dissolve at a boil
Bring the syrup to a boil to fully dissolve the sugar.
Step 4
Return the fruit
Lower the fruit back into the boiling syrup.
Step 5
Simmer gently
Let simmer for 2 minutes.
Step 6
Rest for 24 hours
Remove from heat, cover, and let rest for 24 hours.
With each cycle, the syrup concentration rises, accelerating the osmotic exchange. The fruit will gradually turn translucent — a clear sign that the sugar is penetrating the cells.
Typical schedule:
| Day | Sugar added | Approximate syrup concentration |
|---|---|---|
| Day 1 | 200 g (initial syrup) | 25° Brix |
| Day 2 | + 150 g | 35° Brix |
| Day 3 | + 150 g | 45° Brix |
| Day 4 | + 150 g | 55° Brix |
| Day 5 | + 150 g | 62° Brix |
| Day 6 | + 150 g | 68° Brix |
| Day 7 | + 150 g | 72–75° Brix |
The final bath
On the last day, the syrup should reach 72 to 75° Brix (measurable with a refractometer). If you don't have one, the syrup should be thick, coat the back of a spoon, and form a short thread when allowed to drip.
Step 1
Bring to a boil
Bring the syrup and fruit to a boil one final time.
Step 2
Simmer gently
Let simmer for 3 to 5 minutes.
Step 3
Remove from heat
Take the saucepan off the heat.
Step 4
Rest for 48 hours
This time, leave the fruit in the syrup for a full 48 hours.
Draining and drying
Step 1
Drain on a rack
Lift the fruit out of the syrup and arrange on a wire rack set over a baking sheet.
Step 2
Let drain
Allow to drain for 30 minutes.
Step 3
Dry the fruit
Dry the fruit in a warm, dry spot — either in an oven left slightly ajar at 122 °F (50 °C) for 2 to 3 hours, or at room temperature for 24 to 48 hours in a well-ventilated area.
Step 4
Check the texture
The fruit should feel dry to the touch but remain supple.
Don't discard the syrup! By now it has become a fragrant, deeply flavored fruit syrup. It's wonderful for soaking babas, flavoring cocktails, drizzling over crêpes, or as a base for sorbets.
Glazing or crystallizing (optional)
For the classic crystallized finish:
Step 1
Prepare the syrup
Make a syrup at 30° Baumé (approximately 1 kg of sugar to 500 ml of water).
Step 2
Heat to 230 °F (110 °C)
Bring the syrup to 230 °F (110 °C).
Step 3
Dip the fruit
Quickly dip each piece of fruit into the hot syrup.
Step 4
Dry on a rack
Transfer to a wire rack and leave to dry completely.
Step 5
The crust forms
A white sugar crust will form on the surface.
Which fruits work best for candying
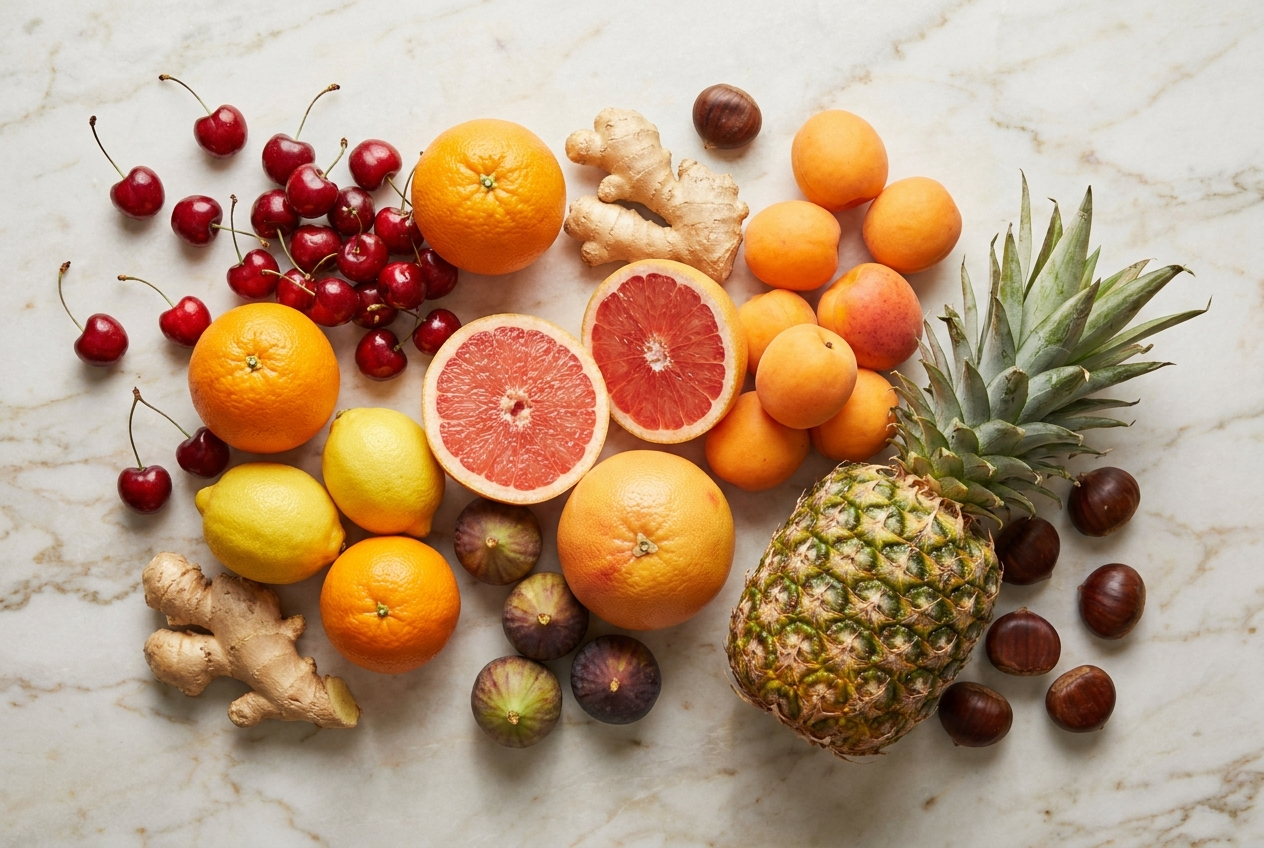
The best candidates for candying
Not all fruits are equally suited to candying. The best choices:
- Cherries: the candied fruit par excellence. Bigarreau cherries, firm and fleshy, are ideal. They candied cherries are a must in fruitcakes and mendiants.
- Citrus peels: orange, lemon, citron, grapefruit. Candied peel is an absolute classic in pastry. candied orange peels are essential for chocolate orangettes.
- Citron: the king of candied fruits. candied citron is a premium ingredient, used in panettones and traditional Christmas cakes.
- Angelica: this green candied stem is the hallmark of classic French pastry. Qualitycandied angelica is recognized by its natural green color (no added coloring).
- Ginger: candied ginger straddles the line between confectionery and pastry ingredient, and is very much on trend.
- Apricots: whole or halved, candied apricots are stunning — though they demand a gentle hand, as the fruit is delicate.
- Figs: dried then candied, figs develop complex flavors of caramel and honey.
- Pineapple: in slices or cubes, candied pineapple is a tropical classic.
- Chestnuts: marrons glacés (candied glazed chestnuts) are a distinct form of candying, with their own specific technique.
Fruits to avoid
Some fruits are poorly suited to candying:
- Very watery fruits (watermelon, melon): too much water to replace — the fruit loses all structure.
- Fragile berries (raspberries, blackberries): they fall apart at the first heating.
- Highly acidic fruits (red currants, blackcurrants): the acidity interferes with sugar crystallization.
- Bananas: the soft texture yields a disappointing result.
Choosing quality fruit
The quality of your starting fruit directly determines the quality of your candied fruit. Basic rules:
- Fruit that is perfectly ripe — neither underripe (too firm, it won't absorb the syrup well) nor overripe (too soft, it will fall apart).
- Fruit that is unblemished and unbruised — damaged spots become weak points during the candying process.
- Seasonal fruit whenever possible — better flavor, better structure.
Storing homemade candied fruits
Shelf life
Properly made candied fruits (with a sugar concentration of 72–75%) keep for a remarkably long time:
- At room temperature: 6 to 12 months in an airtight container, away from light and moisture.
- Refrigerated: up to 18 months.
- Stored in their syrup: fruits kept submerged in the candying syrup will last even longer — up to 2 years.
Storage conditions
- Airtight glass jar (a Le Parfait–style preserving jar works perfectly) or food-grade plastic container.
- Away from direct light.
- Stable temperature, ideally between 59 and 68 °F (15–20 °C).
- If storing dry, separate the pieces with parchment paper to prevent them from sticking together.
Signs that candied fruit has gone off
- Fermentation: bubbling, sour smell, cloudy syrup. Cause: insufficient sugar concentration.
- Mold: surface mold growth. Cause: excess humidity or a poorly sealed container.
- Drying out: the fruit hardens and loses its pliability. Cause: left exposed to air for too long.
Using candied fruits in pastry
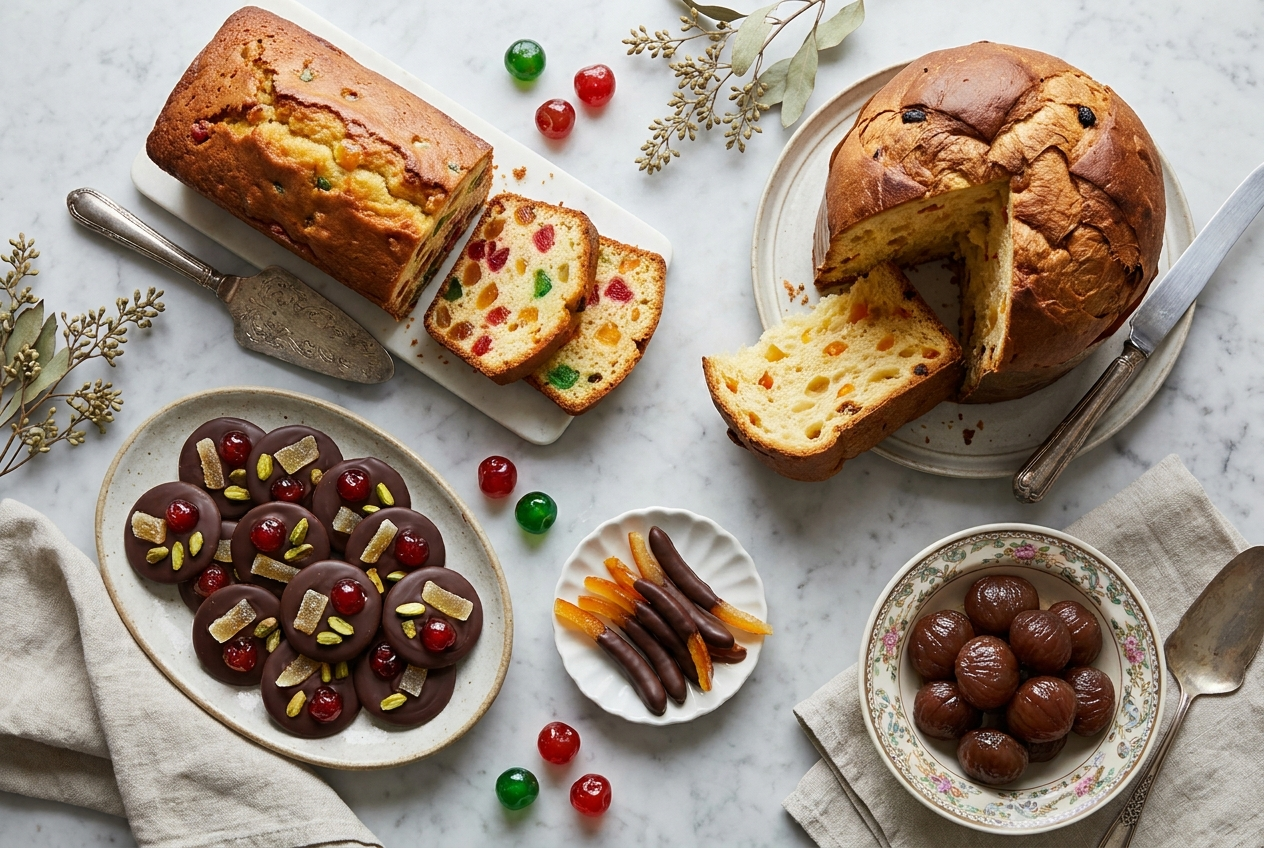
Fruitcake
The fruitcake (or English cake) is the most classic use of candied fruits. For a great candied fruit cake :
- Use a varied mix: candied cherries red and green cherries, orange peel, citron, angelica, rum-soaked raisins.
- Dice the fruit into small, even pieces (5–8 mm).
- Lightly flour the fruit before folding it into the batter — this prevents it from sinking to the bottom of the pan during baking.
- Fold the fruit in last, using a flexible spatula, with a light hand to avoid overworking the batter.
The classic ratio: 300 to 400 g of candied fruit per 1 kg of batter.
Panettone
is inseparable from quality candied fruits. What sets a great panettone apart from a mediocre one is often the quality of the candied fruits used.
For a panettone worthy of the name:
- Des candied orange peels of quality, cut into small cubes.
- Candied citron — the traditional citrus fruit of the panettone.
- Sultana raisins soaked in Marsala or rum.
- No candied cherries in the classic panettone (that's a modern variation).
Candied fruit should account for approximately 20 to 25% of the total weight of the panettone.
Chocolate mendiants
Mendiants (French chocolate bark topped with dried fruits and nuts) are a Christmas classic and a fine exercise in chocolate work. Each mendiant traditionally carries four toppings representing the four mendicant orders:
- Almond (Carmelites)
- Hazelnut (Augustinians)
- Dried fig (Franciscans)
- Raisin (Dominicans)
Modern versions replace or supplement these with candied fruits: a small cube of candied orange peel, a piece of candied ginger, a whole candied cherry.
To make mendiants, you need couverture chocolate properly tempered — candied fruits adhere poorly to chocolate that has not crystallized correctly.
Decorating pastries
Candied fruits are also used as decorative elements:
- : diamonds of candied citron and angelica traditionally adorn the surface.
- Bûche de Noël (French Christmas log cake): candied fruits decorate classic versions.
- Cassata siciliana: this Sicilian frozen dessert makes lavish use of candied fruits.
- Stollen: the German Christmas cake, a cousin of the panettone, is studded with candied peel and raisins.
Confectionery and petits fours
Candied fruits stand beautifully on their own as confections:
- : strips of candied orange peel dipped in dark chocolate. A timeless classic.
- Fruits déguisés (stuffed candied fruits): candied fruits filled with tinted marzipan.
- Marrons glacés (candied glazed chestnuts): chestnuts candied then glazed in syrup — the pinnacle of the confectioner's art.
Store-bought candied fruits: how to recognize quality
If you don't have time to make your own candied fruits, knowing how to distinguish a quality product from a substandard one is essential.
Signs of quality
- Translucency: a good candied fruit is translucent, almost gem-like. You should be able to make out the structure of the fruit through the flesh.
- Suppleness: the fruit should yield gently under your finger — neither hard nor rubbery.
- Fruit flavor: the sugar should not mask the flavor of the original fruit. A quality candied citron should taste of citron, not merely of sugar.
- Natural color: garish hues (fluorescent red cherries, neon green angelica) are a telltale sign of artificial colorants.
- Short ingredient list: fruit, sugar, glucose syrup if applicable. That's it.
Why quality candied fruits matter
The professional-quality candied fruits available at G. Detou are selected for their traditional candying process, their preserved fruit flavor, and the absence of artificial colorants. The difference in a cake or a panettone is immediate: the fruit has flavor, texture, and holds up during baking.
G. Detou's take
Candying a fruit means raising the syrup by a few degrees Brix each day for 8 to 12 days. The mass-produced candied fruits you find at $4 a jar are candied in 12 hours by forced osmosis: they hold their shape, but the fruit's aroma has been swallowed up by the sugar. At rue Tiquetonne, we've been selling candied fruits from Apt and Saint-Rémy-de-Provence since 1951 — fruits candied over ten days or more by traditional confectioners. The difference announces itself with the very first bite of your cake.
FAQ — Homemade candied fruits
The full process takes between 7 and 10 days for most fruits. Each day requires roughly 15 to 20 minutes of hands-on work (removing the fruit, increasing the syrup concentration, returning the fruit). Thick citrus peels — citron in particular — may need up to 14 days for complete candying. It isn't intensive work. It's patient work.
It's possible, but not recommended if you're after the best result. Freezing breaks down the cell walls of the fruit, leaving it softer and more fragile throughout the candying process. The finished product will be less firm and less translucent than one made with fresh fruit. If you do use frozen fruit, thaw it completely and drain it thoroughly before you begin.
There are several possible causes. The most common: the syrup was too concentrated too early, causing the surface of the fruit to candy too aggressively. The exterior "sealed" with sugar while the center remained improperly candied. Another frequent culprit: drying for too long or at too high a temperature. Finally, leaving candied fruits in an open container will dry them out within a few weeks. Always store them in an airtight container.
Absolutely. The leftover syrup is a treasure in its own right. It's sugar-laden, infused with fruit flavor, and often beautifully colored. Uses: soaking babas and savarins, crafting cocktails or homemade lemonades, drizzling over crêpes or waffles, incorporating into sorbets or granitas. It keeps for several months in the refrigerator in a clean, sealed bottle. You can also use it as the base for a new batch of candied fruits — simply add sugar to compensate for any dilution.
G. Detou offers a selection of professional-quality candied fruits — cherries, orange peel, citron, angelica — as well as all the ingredients you need for your pastry recipes. Available in-store on rue Tiquetonne and at gdetou.com.
To go further: browse our full Candied Fruits selection.