

Praline is what separates a decent dessert from a memorable one. This smooth paste of caramelized nuts concentrates within itself all the indulgence of a Paris-Brest, a gianduja, or a simple Sunday morning slice of toast. Yet most recipes you find online skim over the details that make all the difference: the choice of nuts, the caramel cooking, the grinding. The result: a grainy, bitter, or characterless praliné.
This guide follows the method used in professional pastry kitchens, with precise ratios, the classic mistakes to avoid, and every variation worth exploring — hazelnut, almond, pistachio, and beyond.
What exactly is praliné?
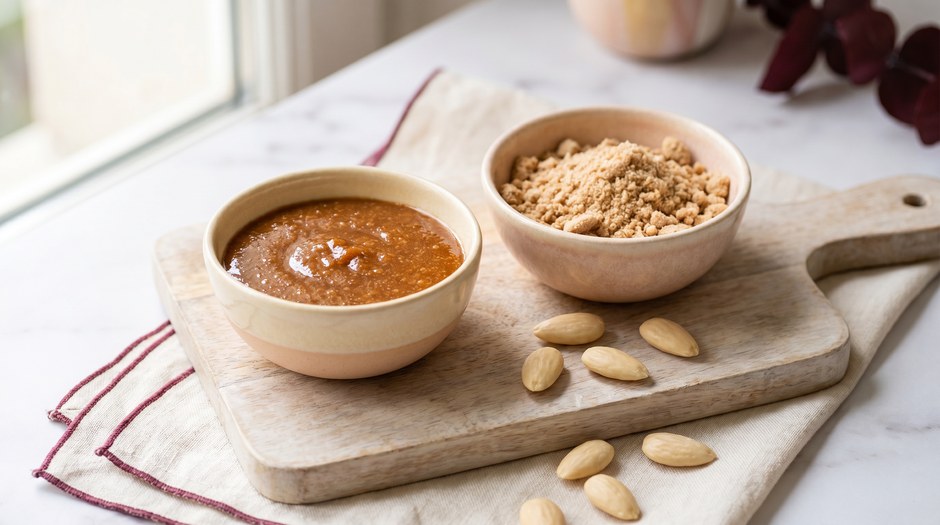
Praliné is a preparation made from nuts (hazelnuts, almonds, pistachios, or a blend) coated in caramelized sugar, then ground down into a more or less smooth paste. It's both a foundational pastry ingredient and a confection in its own right.
Don't confuse it with:
- Praliné: the paste produced after grinding, used as a base in creams, ganaches (a chocolate and cream emulsion), and fillings.
- Pralin: the shards of caramelized nuts before grinding, used as a decoration or crunchy inclusion.
- : whole almonds coated in pink-tinted cooked sugar — a completely different product.
Why make your own praliné at home?
Commercial praliné often contains palm oil, artificial flavorings, and a nut content below 40%. A homemade praliné means at least 50% nuts, zero additives, and a depth of flavor that no store-bought product can match. Freshness makes all the difference: the natural oils in hazelnuts and almonds oxidize quickly, and a freshly ground praliné has an aromatic intensity that simply can't be replicated off a shelf.
Classic homemade praliné recipe (hazelnut-almond, makes approximately 500 g / 1 lb 2 oz)
Prep time: 20 min · Roasting: 15 min · Grinding: 8 to 15 min
Ingredients


The reference ratio: 50% nuts, 50% sugar. This is the professional standard. Some pastry chefs push the nut content to 60% for a more intense praliné, but the texture becomes trickier to work with.
Equipment
- A heavy-bottomed saucepan (copper or stainless steel — avoid non-stick, which makes it impossible to read the caramel color accurately)
- A kitchen thermometer (probe-style is ideal)
- A powerful food processor (such as a Robot Coupe or Thermomix)
- A baking sheet lined with parchment paper or a Silpat mat
- A wooden or high-heat silicone spatula
Method
Step 1
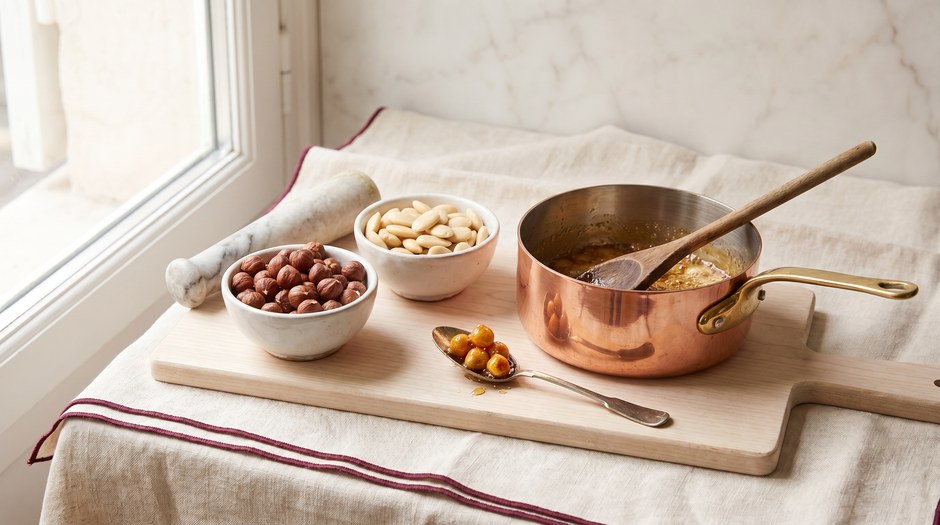
Roast the nuts
Preheat your oven to 150°C (300°F). Spread the hazelnuts and almonds on separate baking sheets — they have different roasting times. Allow 12 to 15 minutes for the hazelnuts, 10 to 12 minutes for the almonds. The nuts should be golden all the way through, not just on the surface. Once the hazelnuts are roasted, rub them vigorously in a clean kitchen towel to remove as much skin as possible — this step is essential, as the skins contribute bitterness and an unpleasant texture.
Step 2
Cook the caramel
Combine the sugar and water in the saucepan. Bring to a boil without stirring. Cook until the caramel reaches 180°C (356°F) — a deep amber color. If you don't have a thermometer, watch for a rich amber hue and the characteristic caramel aroma — but investing in a thermometer is probably the single most worthwhile piece of advice we can offer.
Step 3
Add the nuts
Tip all of the roasted nuts into the caramel at once. Stir quickly with the spatula to coat them evenly. Work fast: the temperature drops immediately and the caramel sets quickly.
Step 4
Cool
Immediately pour onto your lined baking sheet and spread roughly. Do not touch with bare hands — the caramel is at 180°C (356°F). Leave to cool completely, at least 30 minutes.
Step 5
Break and grind
Break the pralin into rough chunks and place them in the food processor. Pulse in 30-second bursts, scraping down the sides between each cycle. The process takes between 8 and 15 minutes depending on the power of your machine. The transformation is gradual: - Coarse powder (1–2 min) - Damp sand (3–5 min) - Grainy paste (5–8 min) - Smooth, glossy paste (8–15 min) — this is praliné
The heat generated by grinding releases the nuts' natural oils, turning the powder into a paste. It's a purely mechanical process — no added fat required.
The mistakes that ruin homemade praliné
Mistake #1: Skipping the roasting
Raw nuts produce a bland, pasty praliné. Roasting develops Maillard flavors, brings out toasted hazelnut and caramel notes, and drives off residual moisture. Without this step, you might as well buy praliné from the supermarket.
Mistake #2: Burning the caramel
Caramel goes from perfect to carbonized in a matter of seconds above 185°C (365°F). A burnt caramel makes for a bitter, acrid praliné — and there's no coming back from it. Better to pull it at 175–180°C (347–356°F) and have a slightly lighter caramel than an over-cooked, bitter one.
Mistake #3: Using an underpowered machine
A standard blender or mini food chopper simply doesn't have the power to release the oils from the nuts. At best, you'll get a gritty powder — never a smooth paste. A food processor with a minimum of 800 W is required. The Thermomix works well for small quantities.
Mistake #4: Grinding while still warm
Processing pralin that hasn't fully cooled causes the caramel to smear rather than fragment cleanly. The mixture sticks to the bowl and the final texture is uneven.
Mistake #5: Adding oil
Some recipes suggest adding a neutral oil to "help" the grinding. If your machine is powerful enough, this is unnecessary — and it dilutes the flavor. The natural oils from the nuts are more than sufficient.
Praliné variations: hazelnut, almond, pistachio, and beyond
Pure hazelnut praliné
The most aromatic. Use 250 g of shelled hazelnuts from Piedmont if possible (IGP-certified are the best, but good-quality Turkish hazelnuts work very well too). Roasting is even more important here, as the hazelnut alone carries all the flavor. This is the base of gianduja when you add couverture chocolate.
Pure almond praliné
Milder and more understated than hazelnut praliné. Ideal for preparations where the praliné should complement without dominating — in a red fruit entremet, for example. Use whole almonds with their skins for more character, or blanched for a lighter color and more delicate flavor.
Pistachio praliné
The most delicate and the most expensive. The pistachios ne se torréfient que très légèrement (5-7 minutes à 140 °C), voire pas du tout si on veut préserver leur couleur verte intense.
A note on color: achieving that striking green requires quality pistachios (Iranian or Bronte) and careful temperature control — overcooked caramel will dull the hue.
Sesame praliné
A lesser-known variation, but a remarkable one. Sesame releases its oils very quickly during grinding, producing a smooth paste in just a few minutes. The flavor is a subtle caramelized tahini — perfect alongside milk chocolate.
Custom blended praliné
There's no rule against combining: 60% hazelnut / 40% almond is the great classic. But 70% hazelnut / 30% pistachio yields a fascinating result, as does 50% almond / 50% sesame. The only constant: keep the overall nut-to-sugar ratio at 50/50.
How to use homemade praliné in pastry
Homemade praliné is a remarkably versatile ingredient. Here are its most common applications:
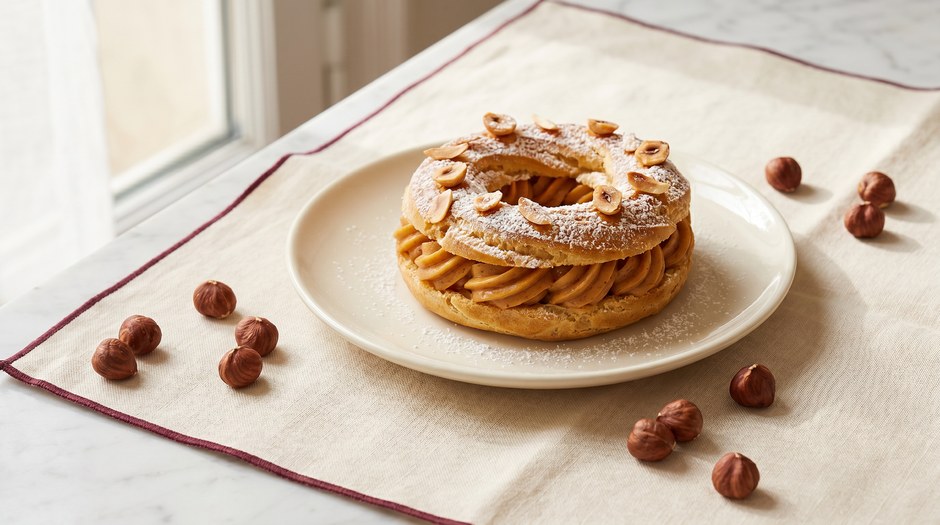
- Paris-Brest: praliné is folded into a mousseline cream or buttercream. Use 30 to 40% praliné relative to the weight of the cream.
- Gianduja: a blend of hazelnut praliné and couverture chocolate melted chocolate. The classic ratio is 50/50, but you can go up to 60% praliné for a more intense gianduja.
- Praliné ganache: add 20 to 30% praliné to a classic ganache for chocolate bonbons or as a filling for a
- Praliné ice cream: fold 15 to 20% praliné into a crème anglaise base before churning. One of the finest ice cream flavors in existence.
- : pure praliné spreads directly. For a softer texture, add a drizzle of hazelnut oil and a pinch of salt.
From praliné paste to homemade nut spread
This is one of the simplest and most rewarding things you can do with homemade praliné: turn it into a homemade spread that puts any commercial product to shame. Compare the ingredient list of a jar of Nutella (sugar listed first, palm oil, just 13% hazelnuts) to that of a homemade praliné spread (50% hazelnuts, couverture chocolate, nothing else), and the choice speaks for itself.

Homemade praliné spread recipe


- Melt the chocolate. Melt the milk chocolate over a double boiler or in the microwave until it reaches 45–50°C (113–122°F).
- Add the praliné. Stir in the praliné at room temperature and mix until thoroughly combined.
- Adjust the texture. If the mixture is too thick, add the oil, then season with fleur de sel.
- Jar it up. Pour into a clean glass jar and leave to set at room temperature.
The result is a smooth, intensely flavored spread — deep toasted hazelnut, rich chocolate — with no added sugar beyond what's already in the praliné and the chocolate. It keeps for 2 to 3 weeks at room temperature.
Homemade spread variations
- Dark chocolate spread: replace the milk chocolate with Guanaja 70% for a more intense, less sweet version. Add 1 tablespoon of honey to balance the bitterness if needed.
- Gianduja spread: use a pure hazelnut praliné with milk chocolate in a 60/40 praliné-to-chocolate ratio. This is the version closest to traditional Piedmontese gianduja.
- Praliné-coffee spread: add 1 teaspoon of coffee extract or instant coffee dissolved in a tablespoon of hot water. The hazelnut-coffee combination is addictive.
- Pistachio-white chocolate spread: replace the hazelnut praliné with pistachio praliné and the milk chocolate with white chocolate (Valrhona Ivoire). The standout trend flavor of 2025–2026, riding the pistachio wave.
The cost of a homemade praliné spread is comparable to a premium store-bought jar — for a result that simply cannot be compared.
Storing homemade praliné
- Refrigerator: 3 to 4 weeks in an airtight jar. It firms up when cold — remove it 30 minutes before use.
- Freezer: up to 3 months with no loss of quality. Thaw overnight in the refrigerator.
- Room temperature: 1 week maximum. The natural nut oils turn rancid in the heat.
In all cases, use a clean, dry container and avoid any contact with water, which would cause the sugar to crystallize.
G. Detou's tip
Many home pastry enthusiasts assume their praliné doesn't turn out well because their machine isn't powerful enough. In reality, the true variable is the roasting: Piedmont hazelnuts at 300°F for 12 to 15 minutes, until the skins begin to crack. If you stop by rue Tiquetonne, we're always happy to share our roasting guidelines — the kind of detail that never makes it onto commercial packaging.
FAQ — Homemade praliné
Yes, though the result will be different. You can use a mortar and pestle to produce a roughly crushed pralin (delicious as a decoration or crunchy inclusion), but achieving a smooth praliné paste requires a machine of at least 800 W. A Thermomix run at progressive speeds (5 to 10) works very well. A standard blender tends to overheat before reaching paste consistency.
Praliné is the paste of ground caramelized nuts — no chocolate involved. Gianduja is the combination of praliné (typically hazelnut) and melted couverture chocolate. Praliné is therefore an ingredient in gianduja, not a synonym for it. A classic gianduja contains roughly 50% praliné and 50% milk chocolate.
There are three likely causes: the food processor isn't powerful enough, the grinding time is too short (it can take up to 15 minutes), or the nuts weren't roasted sufficiently (less oil released). Try processing for longer in 30-second pulses with 15-second breaks between cycles to avoid overheating the motor.
White sugar (sucrose) is the standard because it caramelizes predictably and has a neutral flavor that lets the nuts shine. Unrefined cane sugar works but adds molasses undertones. Honey and maple syrup caramelize differently and produce very different results — interesting in their own right, but no longer a classic praliné.
The quality of praliné depends above all on the quality of the nuts. Fresh, well-roasted hazelnuts, almonds, or pistachios account for 80% of the work. For results that rival professional pastry shops, it's better to invest in quality base ingredients rather than expensive equipment. The professional-grade nuts available at G. Detou are the very same ones artisans in the Montorgueil neighborhood have been using for decades — a solid place to start.