


Tempering chocolate is the one technical skill that separates a glossy, snappy coating from a dull surface that blooms within two days. It's not magic — it's applied crystallography. Cocoa butter exists in six crystalline forms, and the goal of tempering is to obtain exclusively Form V (beta crystals), the one responsible for shine, snap, and stability.
This guide covers the three methods used in professional kitchens — tabling, seeding, and Mycryo — with the exact temperature curves for each type of couverture chocolate.
Why temper couverture chocolate?
Chocolate that is simply melted and allowed to cool will crystallize chaotically. Forms I through IV mix with the desired Form V crystals, causing:
- A dull, grayish appearance instead of the characteristic mirror shine
- A soft or waxy texture instead of a clean snap
- Fat bloom: those white streaks that appear within days as cocoa butter migrates to the surface
- Demolding problems: poorly tempered chocolate doesn't contract properly and sticks to molds
- Shortened shelf life: drops from several months to just a few weeks
Tempering is essential for enrobing, molding, decorations, and chocolate confections. It is, however, unnecessary for ganaches, mousses, or cakes where the chocolate is mixed with other ingredients.
What is couverture chocolate?
The term "couverture" refers to chocolate containing a minimum of 31% cocoa butter (compared to 18% in standard baking chocolate). This high fat content is precisely what makes tempering possible: the more cocoa butter present, the more controllable the crystallization — and the more brilliant the result.
The major professional brands — Valrhona, Cacao Barry, Weiss — produce couverture chocolates specially formulated for tempering, with viscosity and fluidity calibrated to the intended use (coating, molding, ganache).
Tempering temperatures by chocolate type
This is the most important table in this article. Print it out and pin it on your kitchen wall.
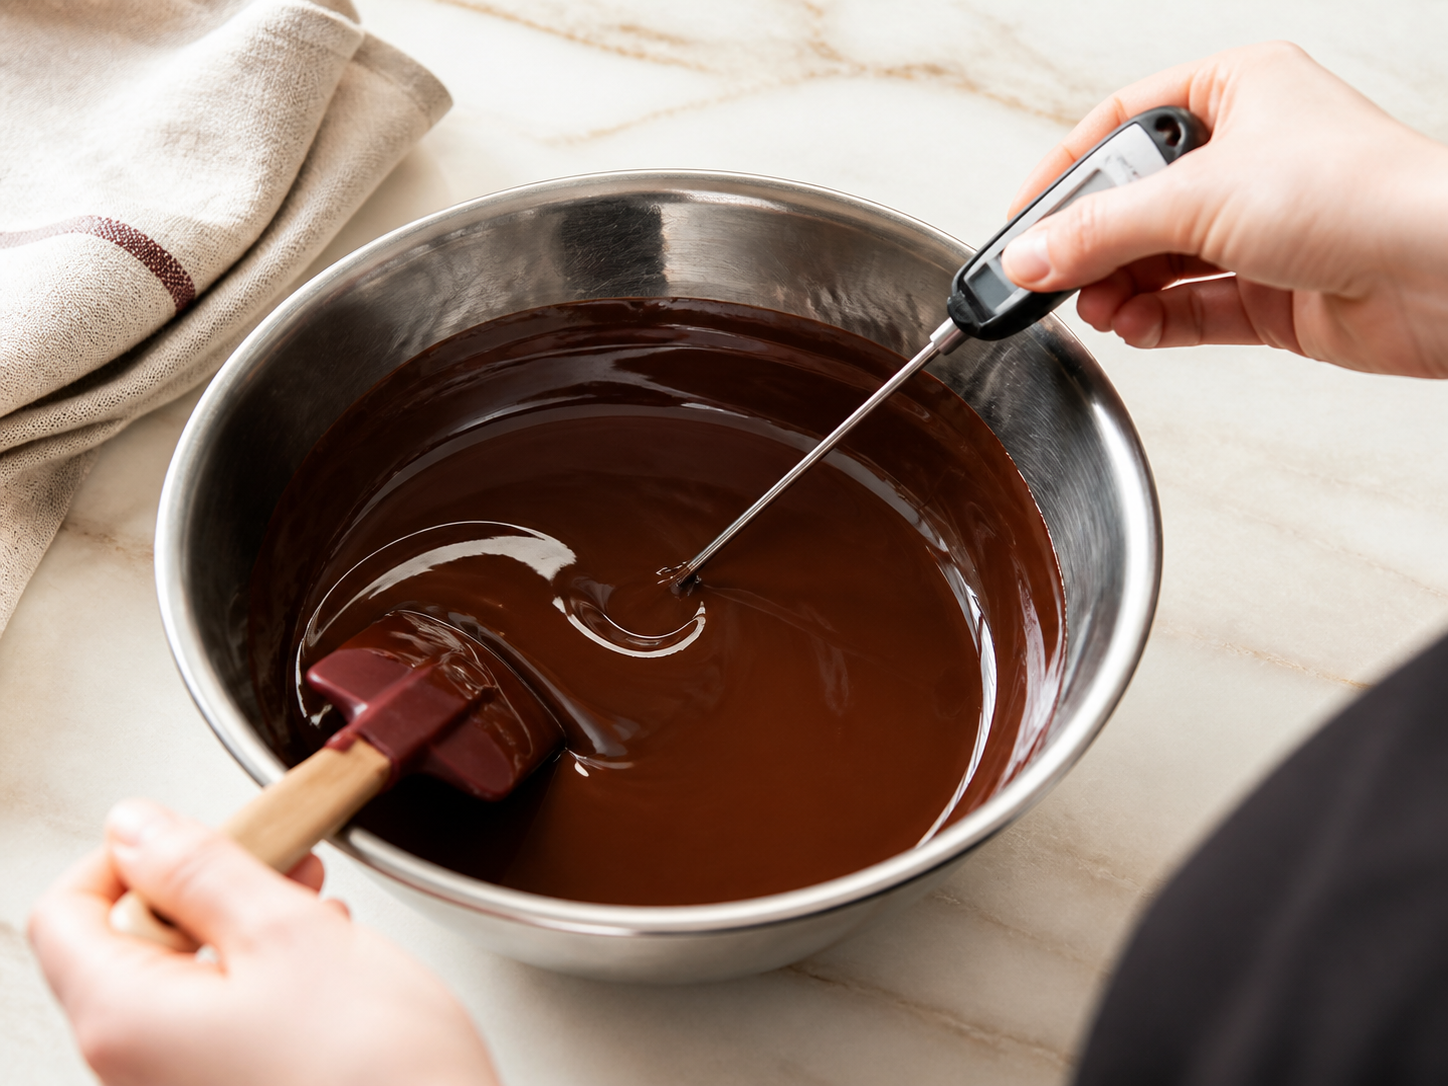
| Chocolate type | Melting | Crystallization | Working temperature |
|---|---|---|---|
| Dark (e.g., Guanaja 70%) | 50–55 °C (122–131 °F) | 28–29 °C (82–84 °F) | 31–32 °C (88–90 °F) |
| Milk (e.g., Jivara 40%) | 45–50 °C (113–122 °F) | 27–28 °C (81–82 °F) | 29–30 °C (84–86 °F) |
| White (e.g., Ivoire 35%) | 40–45 °C (104–113 °F) | 26–27 °C (79–81 °F) | 28–29 °C (82–84 °F) |
Why three temperature stages?
- Full melt: destroy all existing crystals to start from a neutral base.
- Crystallization (cooling): bring the temperature down to trigger the formation of Form V crystals.
- Working temperature (slight rewarming): eliminate unstable crystals (Forms IV and below) while preserving the Form V crystals. This is the temperature at which the chocolate is ready to use.
These temperatures are guidelines. Each chocolate has its own specificities — the manufacturer's technical data sheet is always the ultimate reference. Valrhona and Barry provide specific tempering curves for each of their references.
Method 1: tabling on marble
The classic chocolatier's method — the most spectacular and the most physical. It requires a marble slab (or a cold surface such as granite) and two scrapers (an offset spatula and a triangle scraper).
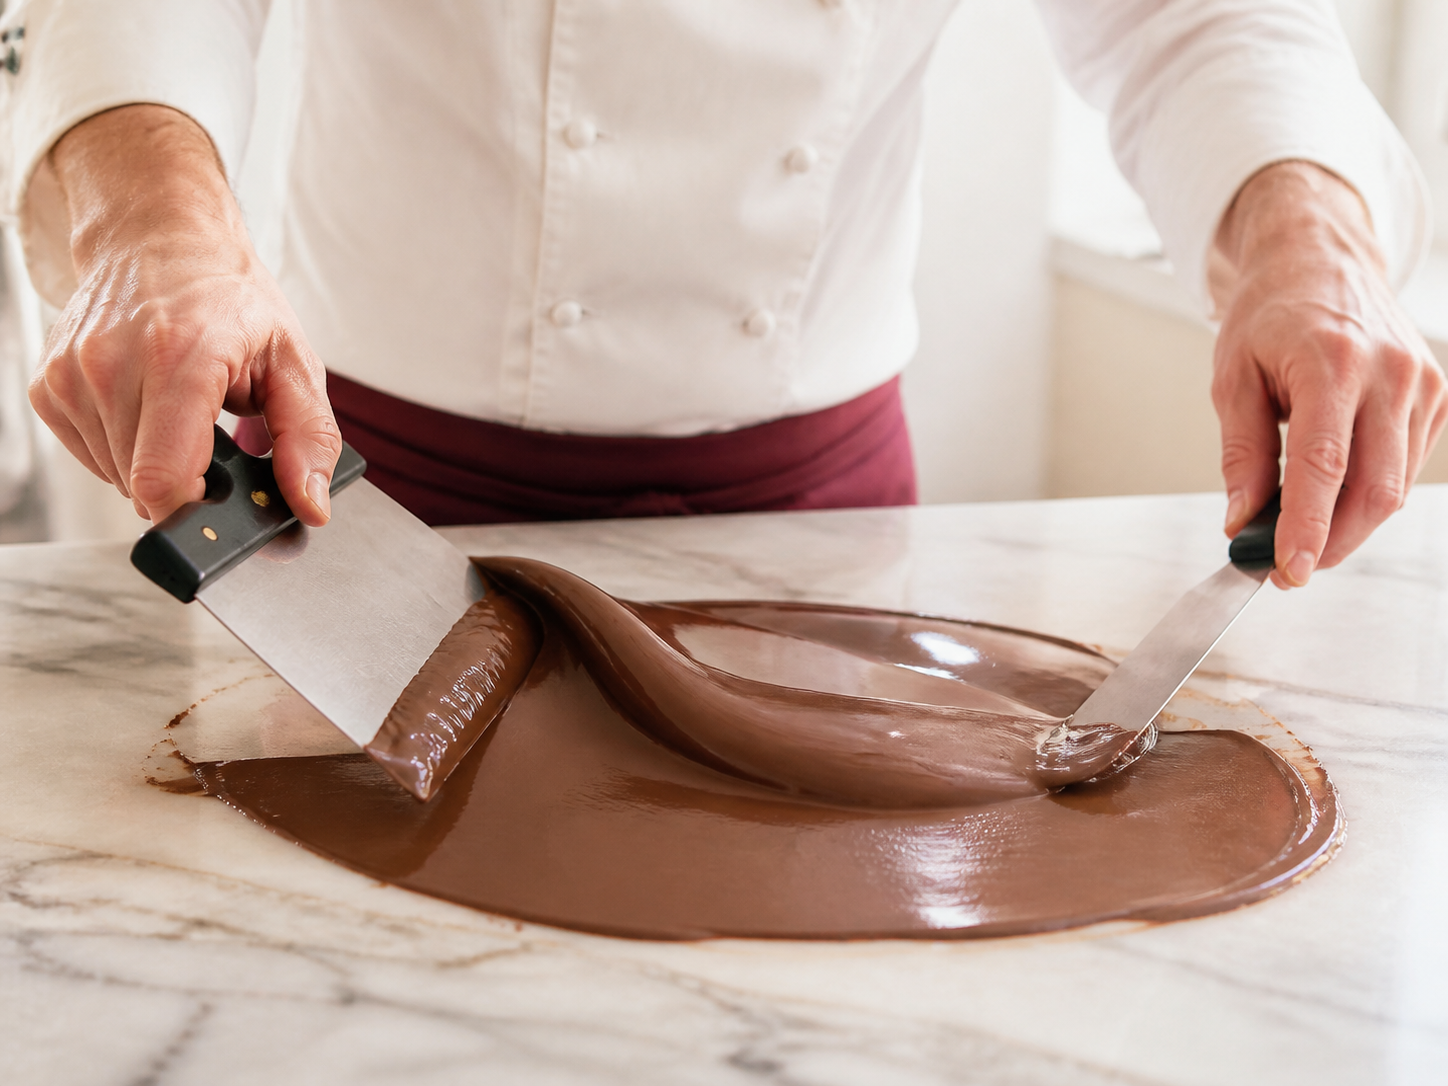
Steps for tabling
- Melt the chocolate in a double boiler or microwave until it reaches the full melting temperature (see table). Make sure there are no solid pieces remaining.
- Pour two-thirds of the melted chocolate onto a clean, dry marble surface. Keep the remaining third in the bowl, warm.
- Work with the triangle scraper and offset spatula: spread the chocolate into a thin layer, bring it back to the center, spread again. This continuous movement cools the chocolate gradually and encourages the formation of uniform crystals. Continue until the crystallization temperature is reached (28–29 °C / 82–84 °F for dark chocolate).
- Fold the tabled chocolate back into the bowl containing the reserved third. Mix thoroughly. The temperature should rise back up to the working temperature (31–32 °C / 88–90 °F for dark chocolate).
- Test: dip the tip of a knife into the chocolate. If it sets in 3–5 minutes with a glossy, even appearance, the tempering is successful.
Advantages and limitations of tabling
Advantages: reliable results, visual and tactile control of crystallization, works with any quantity.
Limitations: requires a marble slab, a degree of manual dexterity, and a workspace that isn't too warm (ideally 18–20 °C / 64–68 °F). The chocolate can set too quickly in a cold kitchen in winter, or too slowly in summer.
Method 2: seeding
The most accessible method for home cooks and the most widely used in small professional kitchens. No marble slab or large work surface required.
The principle behind seeding
The idea is straightforward: solid chocolate (already crystallized in Form V) is added to melted chocolate. The existing crystals act as "seeds" that guide the crystallization of the entire mass. Think of it like planting seeds in a field — the Form V crystals multiply from the added nuclei.
Steps for seeding
- Melt 70 to 80% of the total chocolate in a double boiler or microwave until it reaches the full melting temperature.
- Remove from heat and gradually add the remaining 20 to 30% in the form of pistoles or finely chopped chocolate. This is the "seed."
- Stir constantly with a spatula. The solid chocolate pieces melt on contact with the hot chocolate, while introducing their Form V crystals. The temperature drops gradually.
- Monitor the temperature: when it reaches the crystallization temperature (28–29 °C / 82–84 °F for dark), make sure all the solid pieces have melted. If any remain, remove them — they've done their job.
- Rewarm very gently (in a double boiler in 5-second bursts) to reach the working temperature (31–32 °C / 88–90 °F for dark).
- Test as with tabling.
Pistoles make seeding easier
Couverture chocolates sold in the form of pistoles (small, uniformly sized discs) are ideal for seeding. Their consistent size ensures even melting and a homogeneous introduction of crystals. The Guanaja by Valrhona, the Barry and Weiss chocolates are all available in pistoles, which considerably simplifies the process.
Advantages and limitations of seeding
Advantages: no marble required, intuitive method, low risk of over-crystallization, works well for quantities between 500 g and 2 kg.
Limitations: slower than tabling for large quantities; requires good-quality seed chocolate (not supermarket baking chocolate).
Method 3: Mycryo cocoa butter
The most recent and simplest method. Developed by Cacao Barry, it uses Mycryo cocoa butter — pre-crystallized cocoa butter reduced to a fine powder — as a pure seeding agent. This method has truly revolutionized tempering, to the point of becoming the technique of choice for the majority of pastry chefs working with small to medium quantities.
What exactly is Mycryo?
Mycryo is pure cocoa butter transformed through a cryogenic process into a fine, stable powder. In practice, the cocoa butter is cooled extremely rapidly to very low temperatures, which crystallizes it in a pre-tempered state (Form V crystals — the stable form of cocoa butter). The resulting powder looks like a creamy-white talc, slightly greasy to the touch.
Just 100 g of Mycryo is enough to temper 10 kg of chocolate — making the cost per use entirely negligible.
How Mycryo works
Classical tempering relies on a precise temperature cycle (melting, cooling, rewarming) that forces cocoa butter to crystallize in the correct form. Mycryo bypasses this process: since it is already crystallized in the correct form, simply adding it to melted chocolate at the right temperature is enough to "seed" the mass and trigger proper crystallization throughout.
It follows the same principle as seeding with finely grated chocolate, but is more reliable and considerably simpler.
Mycryo-specific temperature curves
The addition temperatures for Mycryo differ slightly from those used in classical methods. Here is the reference table:
| Chocolate type | Melting temperature | Mycryo addition temperature |
|---|---|---|
| Dark chocolate | 50–55 °C (122–131 °F) | 34–35 °C (93–95 °F) |
| Milk chocolate | 45–50 °C (113–122 °F) | 33–34 °C (91–93 °F) |
| White chocolate | 40–45 °C (104–113 °F) | 32–33 °C (90–91 °F) |
The key point: Mycryo is added once the chocolate has cooled down to its working temperature — not while it is still very hot.
Detailed Mycryo protocol
- Melt the chocolate. Chop your couverture or use pistoles and melt in a double boiler or microwave (in 20–30 second bursts at medium power, stirring between each). Bring to the full melting temperature until completely smooth.
- Cool the chocolate. Remove from the double boiler and allow to cool, stirring regularly. You can speed this up by setting the bowl on a cool surface (being careful not to introduce any moisture). Monitor the temperature with a precision thermometer.
- Add the Mycryo. When the chocolate reaches the addition temperature (see table), sprinkle in 1% of the chocolate's weight in Mycryo (5 g per 500 g, 10 g per 1 kg) and stir gently but thoroughly until fully incorporated, with a smooth, grain-free consistency.
- Check the temper. Dip the tip of a knife into the chocolate and set it somewhere cool (not in the refrigerator). Within 3 to 5 minutes, it should begin to set with a slightly satin finish. If it remains soft and matte, the temper hasn't taken — recheck your temperatures.
- Work the chocolate. Use the tempered chocolate immediately for molding, enrobing, decorations, or confections. Maintain it at working temperature by stirring regularly. If it thickens, rewarm very gently (1–2 °C / 2–4 °F maximum), never exceeding the Mycryo addition temperature, or you risk losing the temper.
Mycryo dosage: adjustments for specific situations
The standard 1% dosage works in the vast majority of cases. A few clarifications:
- Very fluid chocolate (high cocoa butter content couverture): stick to 1% — the fluidity actually aids incorporation.
- Small quantity (under 200 g): the chocolate cools quickly, so stay vigilant about temperature. Dosage remains 1%.
- Large quantity (over 2 kg): the thermal mass is significant, meaning slower cooling and more working time. Still 1%.
- Adding praliné (a paste of caramelized nuts), fruit paste, etc.: calculate the Mycryo based on the weight of chocolate alone, not the total weight of the mixture.
Mycryo or marble tabling: which method to choose?
Advantages of Mycryo:
- Simplicity: no marble slab, no physical tabling, no risk of over-crystallization
- Reproducibility: consistent results as long as temperatures are respected
- Time efficiency: 5 minutes of handling versus 15–20 for tabling
- Minimal equipment: a thermometer, a bowl, and a spatula are all you need
- Suited to small quantities: tabling is awkward with under 500 g; Mycryo works even with 200 g
When tabling is still the right choice:
- Large-scale production: beyond 5 kg, tabling or an automated tempering machine is more efficient
- Full control: tabling allows fine-tuning of viscosity and working time
- No Mycryo on hand: tabling requires no additional ingredients
In practice, most professional pastry chefs use Mycryo for small to medium quantities and switch to a tempering machine for large productions. For the home cook, Mycryo is the most reliable solution.
Other uses for Mycryo
Mycryo isn't just for tempering. As pure cocoa butter in powder form, it is a remarkably versatile ingredient — with a high smoke point (around 200 °C / 392 °F), well above that of regular butter. It can replace butter or oil when searing foie gras, pan-roasting scallops, or cooking duck breast, delivering clean caramelization and the faintest hint of cocoa. It's also used to coat truffles (creating a thin, crisp shell), to thin out an enrobing mixture, or to waterproof a tart shell (a brush of Mycryo-tempered chocolate keeps the base crisp under a moist filling).
Storage: 12 to 18 months in a dry place between 59–68 °F (15–20 °C), away from moisture (Mycryo clumps if it gets damp), light, and strong odors.
Common tempering mistakes to avoid
Exceeding the melting temperature
Above 55 °C (131 °F) for dark chocolate (50 °C / 122 °F for milk, 45 °C / 113 °F for white), the chocolate scorches. Proteins and sugars break down irreversibly. The result is grainy, thick, and beyond saving. Always use a thermometer.
Introducing water or moisture
A single drop of water in melted chocolate causes it to seize — turning into a thick, grainy mass that is completely unusable. Dry all utensils thoroughly, never cover the double boiler (condensation will drip back into the chocolate), and keep all steam sources well away.
Working in a room that is too warm
Above 22 °C (72 °F), tempering becomes unpredictable. The ideal workspace is between 18 and 20 °C (64–68 °F) with humidity below 60%.
Stirring too vigorously
Aggressive stirring incorporates air bubbles that create surface defects. Use slow, broad strokes, keeping the spatula in contact with the bottom of the bowl.
Not testing before use
A test takes 3 minutes and can save an entire batch. Dip a spatula or the tip of a knife into the tempered chocolate. At room temperature (18–20 °C / 64–68 °F), it should set in 3 to 5 minutes with a glossy finish and release cleanly. If the result is dull or takes more than 5 minutes to set, start the tempering process again.
Which couverture chocolate to choose for your first temper?
For a first attempt at tempering, choose a dark chocolate with a cacao content between 55% and 65%. The higher the percentage, the more technically demanding the chocolate (more cocoa butter, narrower crystallization window).
A few reliable references available at G. Detou:
- Valrhona Guanaja 70% : the benchmark for intense dark chocolate. Demanding to temper, exceptional results.
- Valrhona Jivara 40% : the benchmark milk chocolate, with malty and caramel notes. Easier to temper.
- Valrhona Ivoire 35% : a quality white chocolate with vanilla notes. The most temperature-sensitive.
- Cacao Barry : wide range, excellent value for money for large productions.
- Weiss : a historic French chocolate maker with a round and distinctive aromatic profile.
What to do if tempering fails?
Remelt the chocolate completely to the full melting temperature to destroy all crystals, then start over. You can repeat this as many times as needed — the chocolate doesn't degrade as long as you don't exceed the maximum temperature and no water is introduced. Poorly tempered chocolate remains perfectly usable for ganaches, mousses, or cakes.
G. Detou's advice
Nine times out of ten, tempering fails because of the thermometer, not the chocolate. A 1 °C (2 °F) discrepancy is enough to make a bar bloom. Since 1951, we've been advising the pastry chefs who come through our doors at 58 rue Tiquetonne, Paris 2nd arrondissement, to use two thermometers and cross-check them: a probe thermometer and an infrared one for the surface. Valrhona and Barry, which we sell in pistoles, print their exact tempering curves right on the bags — hold onto those. They're more reliable than the average figures you'll find in most books.
FAQ — Tempering chocolate
The microwave is a method many professionals appreciate for the initial melt: 20–30 second bursts at medium power (500–600 W), stirring between each pass. It doesn't replace tempering, but it speeds up the melting stage. Watch out for hot spots, which can cause the chocolate to exceed its maximum temperature.
Couverture chocolate contains a minimum of 31% cocoa butter, which gives it its fluidity and its ability to be tempered. Supermarket baking chocolate often contains less than 20% cocoa butter, replaced by vegetable fats. These fats do not crystallize like cocoa butter: tempering is impossible or yields poor results. For any enrobing or molding work, couverture chocolate is essential.
Away from light, moisture, and strong odors, between 15 and 18 °C (59–64 °F). Never store in the refrigerator — the condensation that forms when chocolate returns to room temperature causes bloom. Pistoles keep for 12 to 18 months in their original sealed packaging. Once opened, transfer to an airtight container and use within 6 months.
Yes. It has a high smoke point and can replace butter or oil for cooking and light frying. Use approximately 50% of the usual butter weight, as Mycryo is pure fat, with no water or proteins. Mycryo Can Mycryo be replaced with block cocoa butter?
Does Mycryo give tempered chocolate a cocoa flavor?
How long does chocolate tempered with Mycryo keep?
Tempering chocolate is a skill acquired through practice. First attempts will be imperfect — that is perfectly normal. What makes the difference is the consistency of the chocolate used. A well-formulated professional couverture chocolate is more forgiving of minor errors than a low-grade chocolate. This is one of the rare areas where the quality of the raw ingredient makes the technical gesture more accessible, not more difficult.
Tempering chocolate is a skill acquired through practice. First attempts will be imperfect — that is perfectly normal. What makes the difference is the consistency of the chocolate used. A chocolat de couverture professionnel well-formulated is more forgiving of minor errors than a low-grade chocolate. This is one of the rare areas where the quality of the raw ingredient makes the technical gesture more accessible, not more difficult.
To go further: browse our full Chocolate & Confectionery selection.